
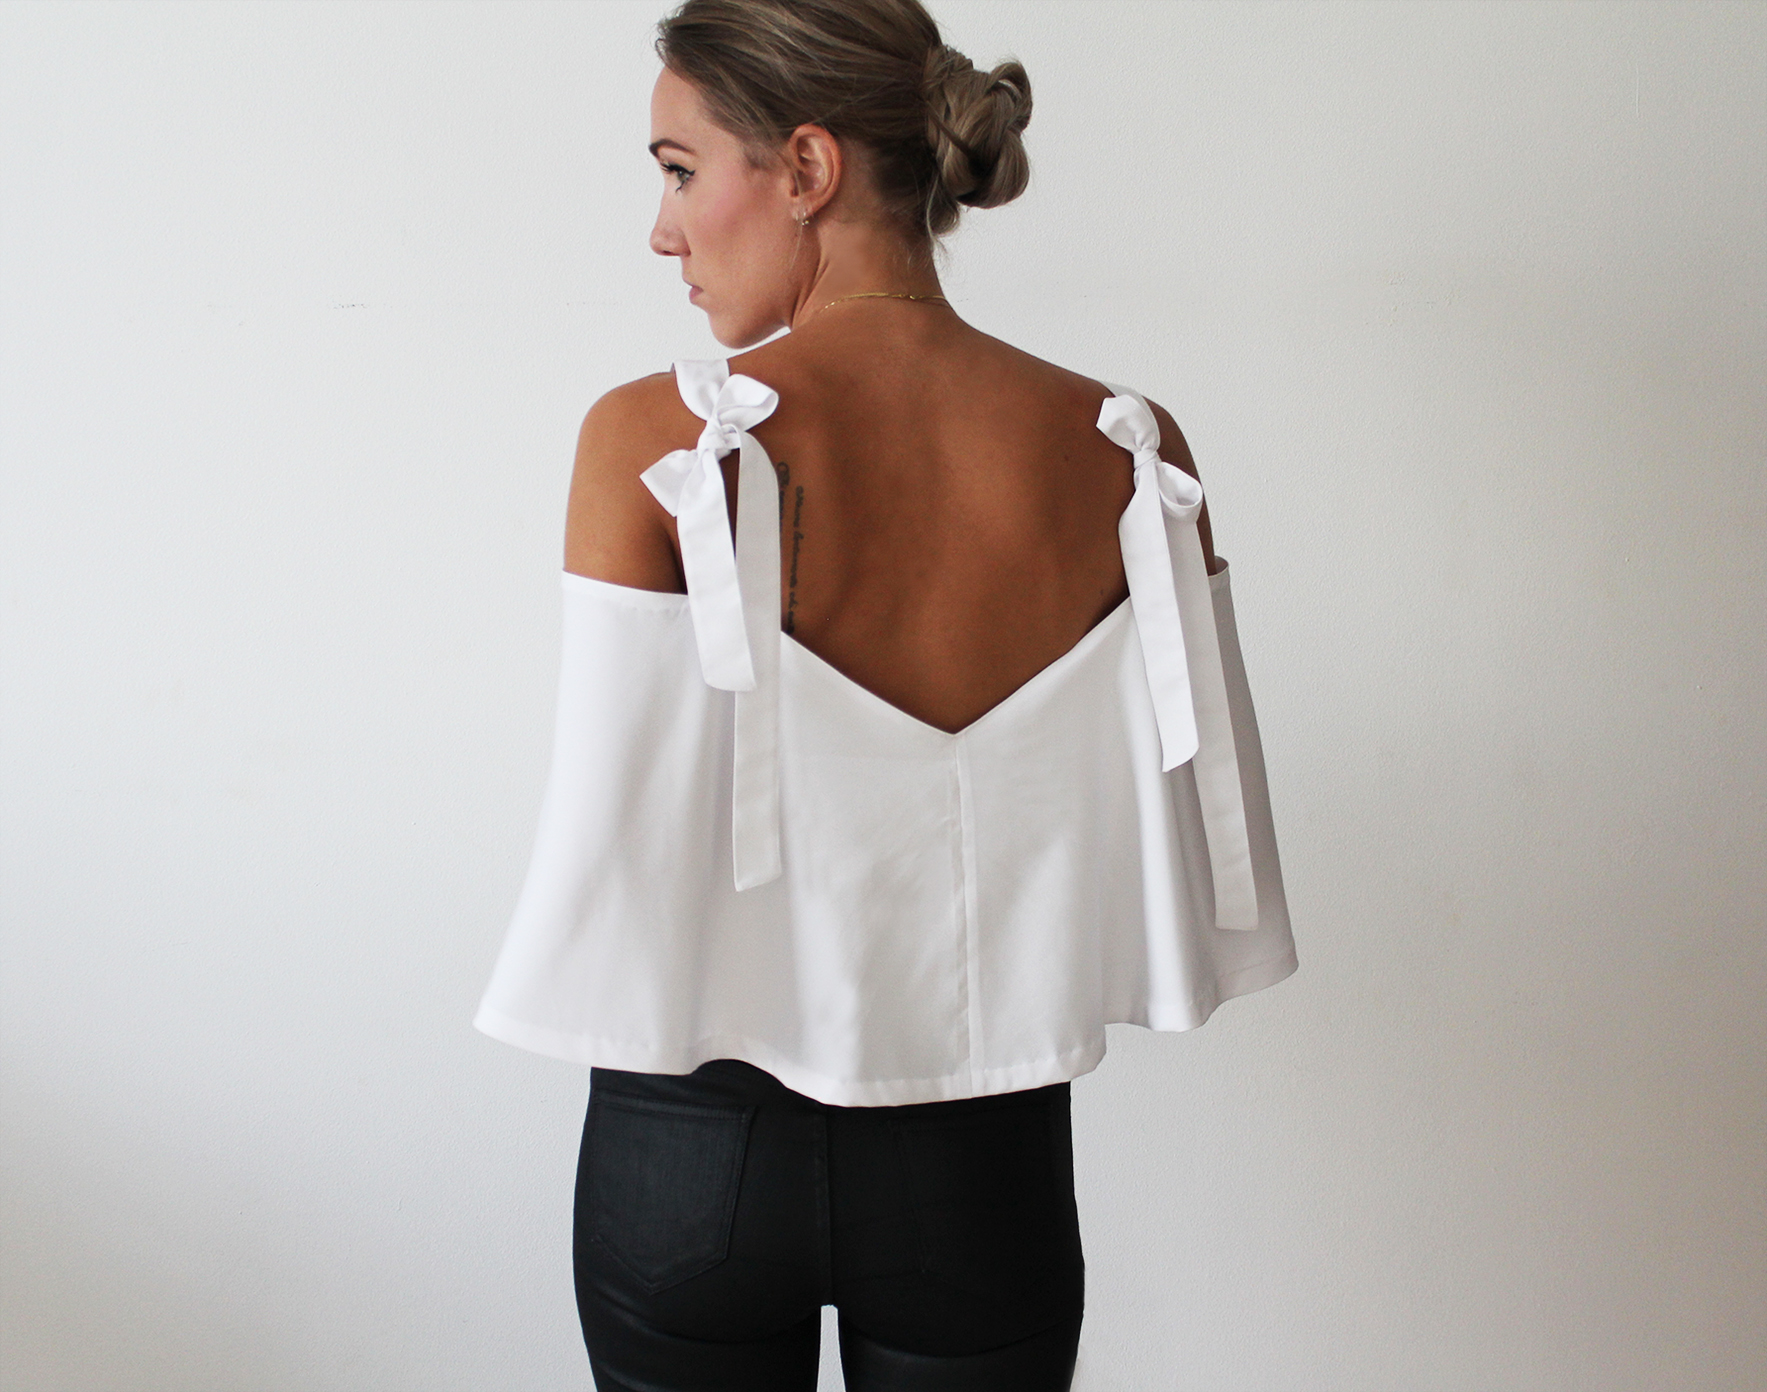
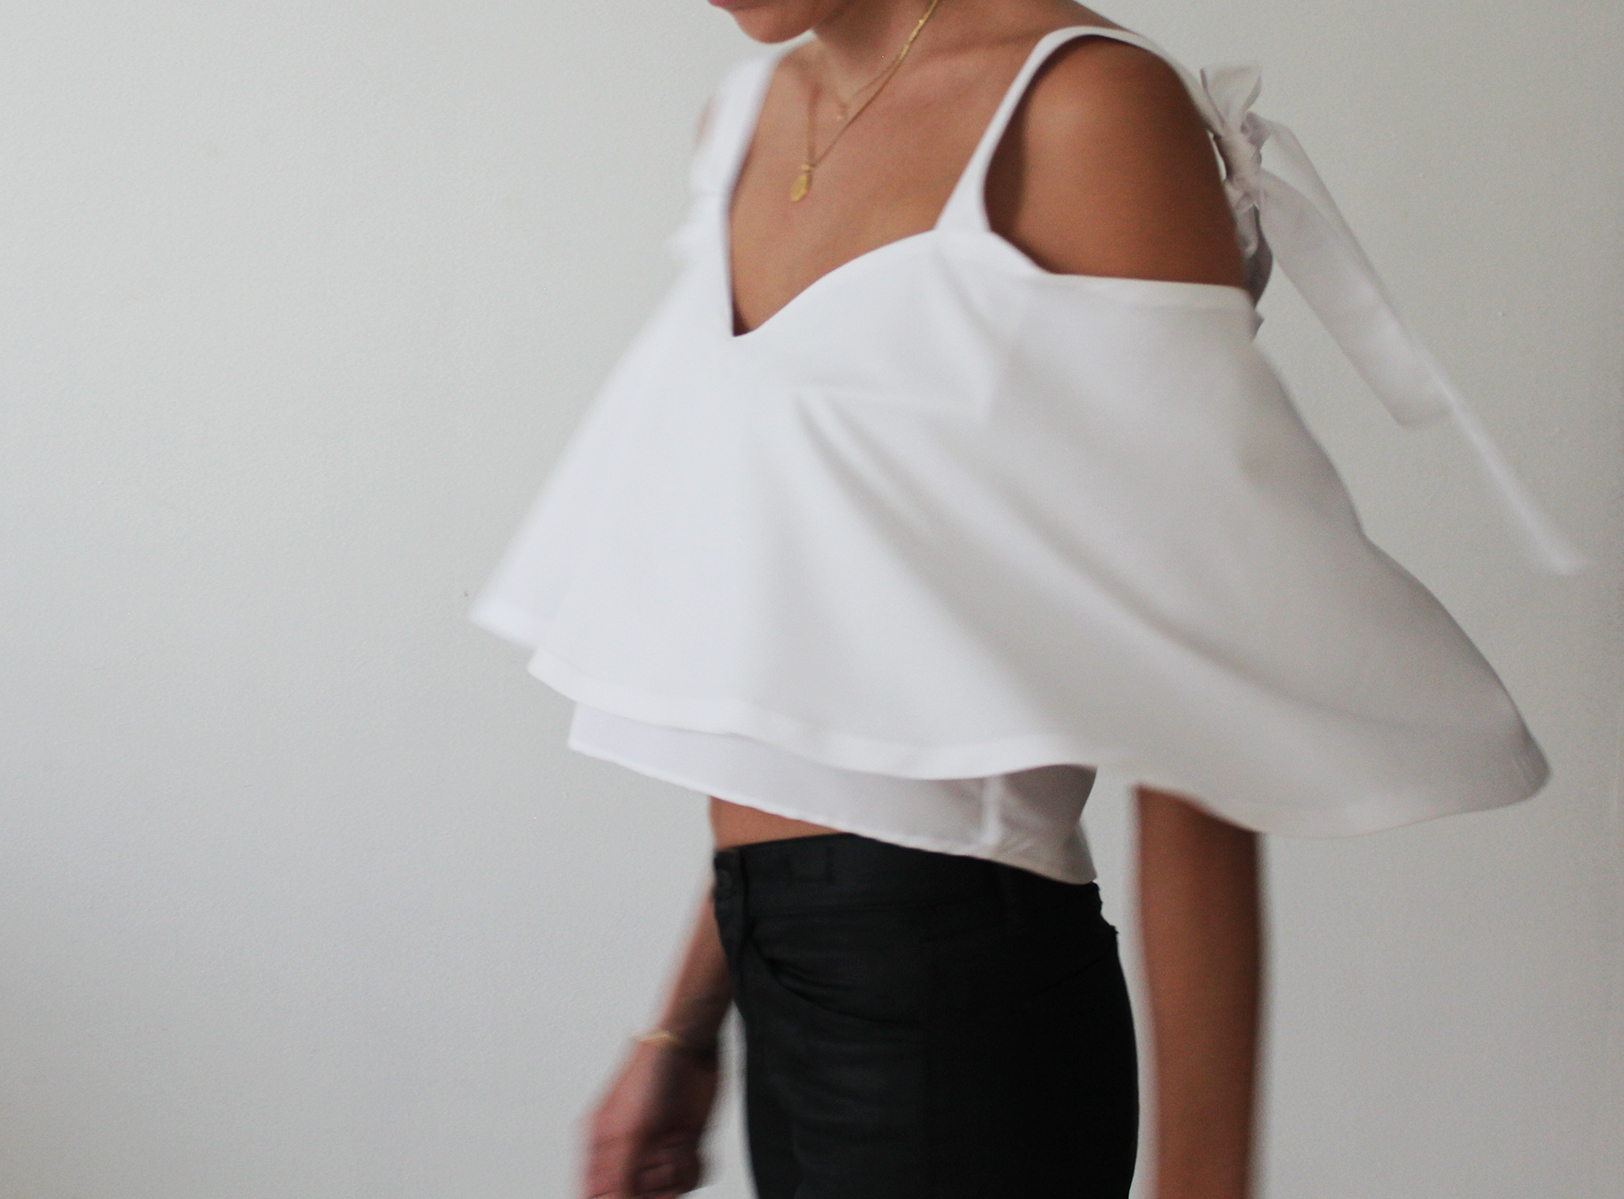
Ferragamo made me do it. I've been wearing the cropped off-the-shoulder top I made recently quite a bit and was looking to add some crisp white to the mix. Massimiliano Giornetti, the mastermind behind Salvatore Ferragamo's SS16 collection gave me the perfect inspiration for this one. Instead of just doing a ruffle, I turned it into an off-the-shoulder version by just making the ruffle piece longer so the arms can fit under.
Tutorials take a lot of time & effort to create, and I choose to make mine available for free. If you enjoy this guide, you can support me with a donation that feels right for you, here.
TOOLS:
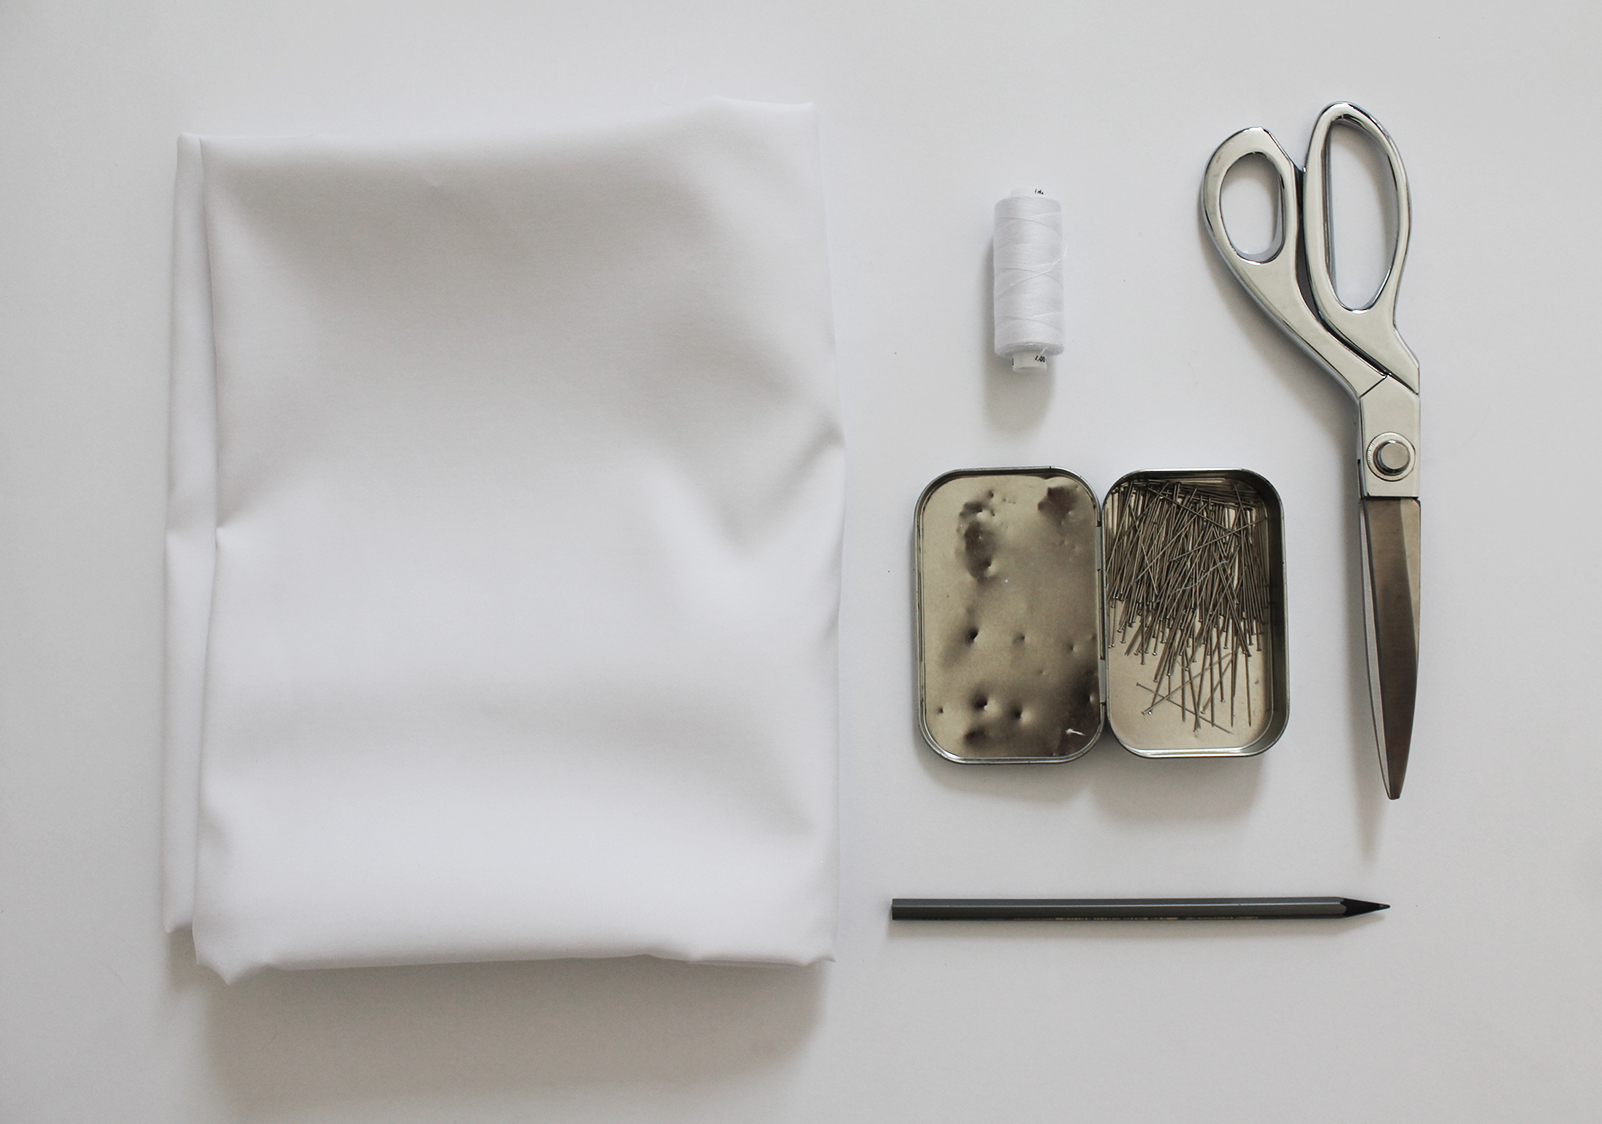
Fabric (I used 100% cotton, 1,5 m of it) | Pencil/fabric marker | Pins | Thread & sewing machine, needle | Scissors
I. When cutting the ruffle out, treat it like a circle skirt - only the measurement you'd normally take from your waist is now taken by wrapping the measurement tape around yourself, just above the bust, including your arms - essentially where an off-the-shoulder top would sit. I made mine a half-circle, if you wanted a fuller ruffle you could go full circle. This decision will impact how much fabric you need and how you do the math. In my case, my desired circumference was 105 cm. Since I was doing a half-circle ruffle, the full circumference of the imagined circle would be double that, 210 cm. From that you can calculate the radius using this formula: radius = circumference / 6,28. Or if not in the mood for math, you can use this tool) - choose the "Calculate Area and Radius | Given C" option and enter your circumference). My radius was about 33 cm. Proceed to trace and cut out your half circle like you would for a skirt, based on how long you want the ruffle to be (if it's your first time, here's some visual guidance for a 1) half-circle, and 2) full circle).
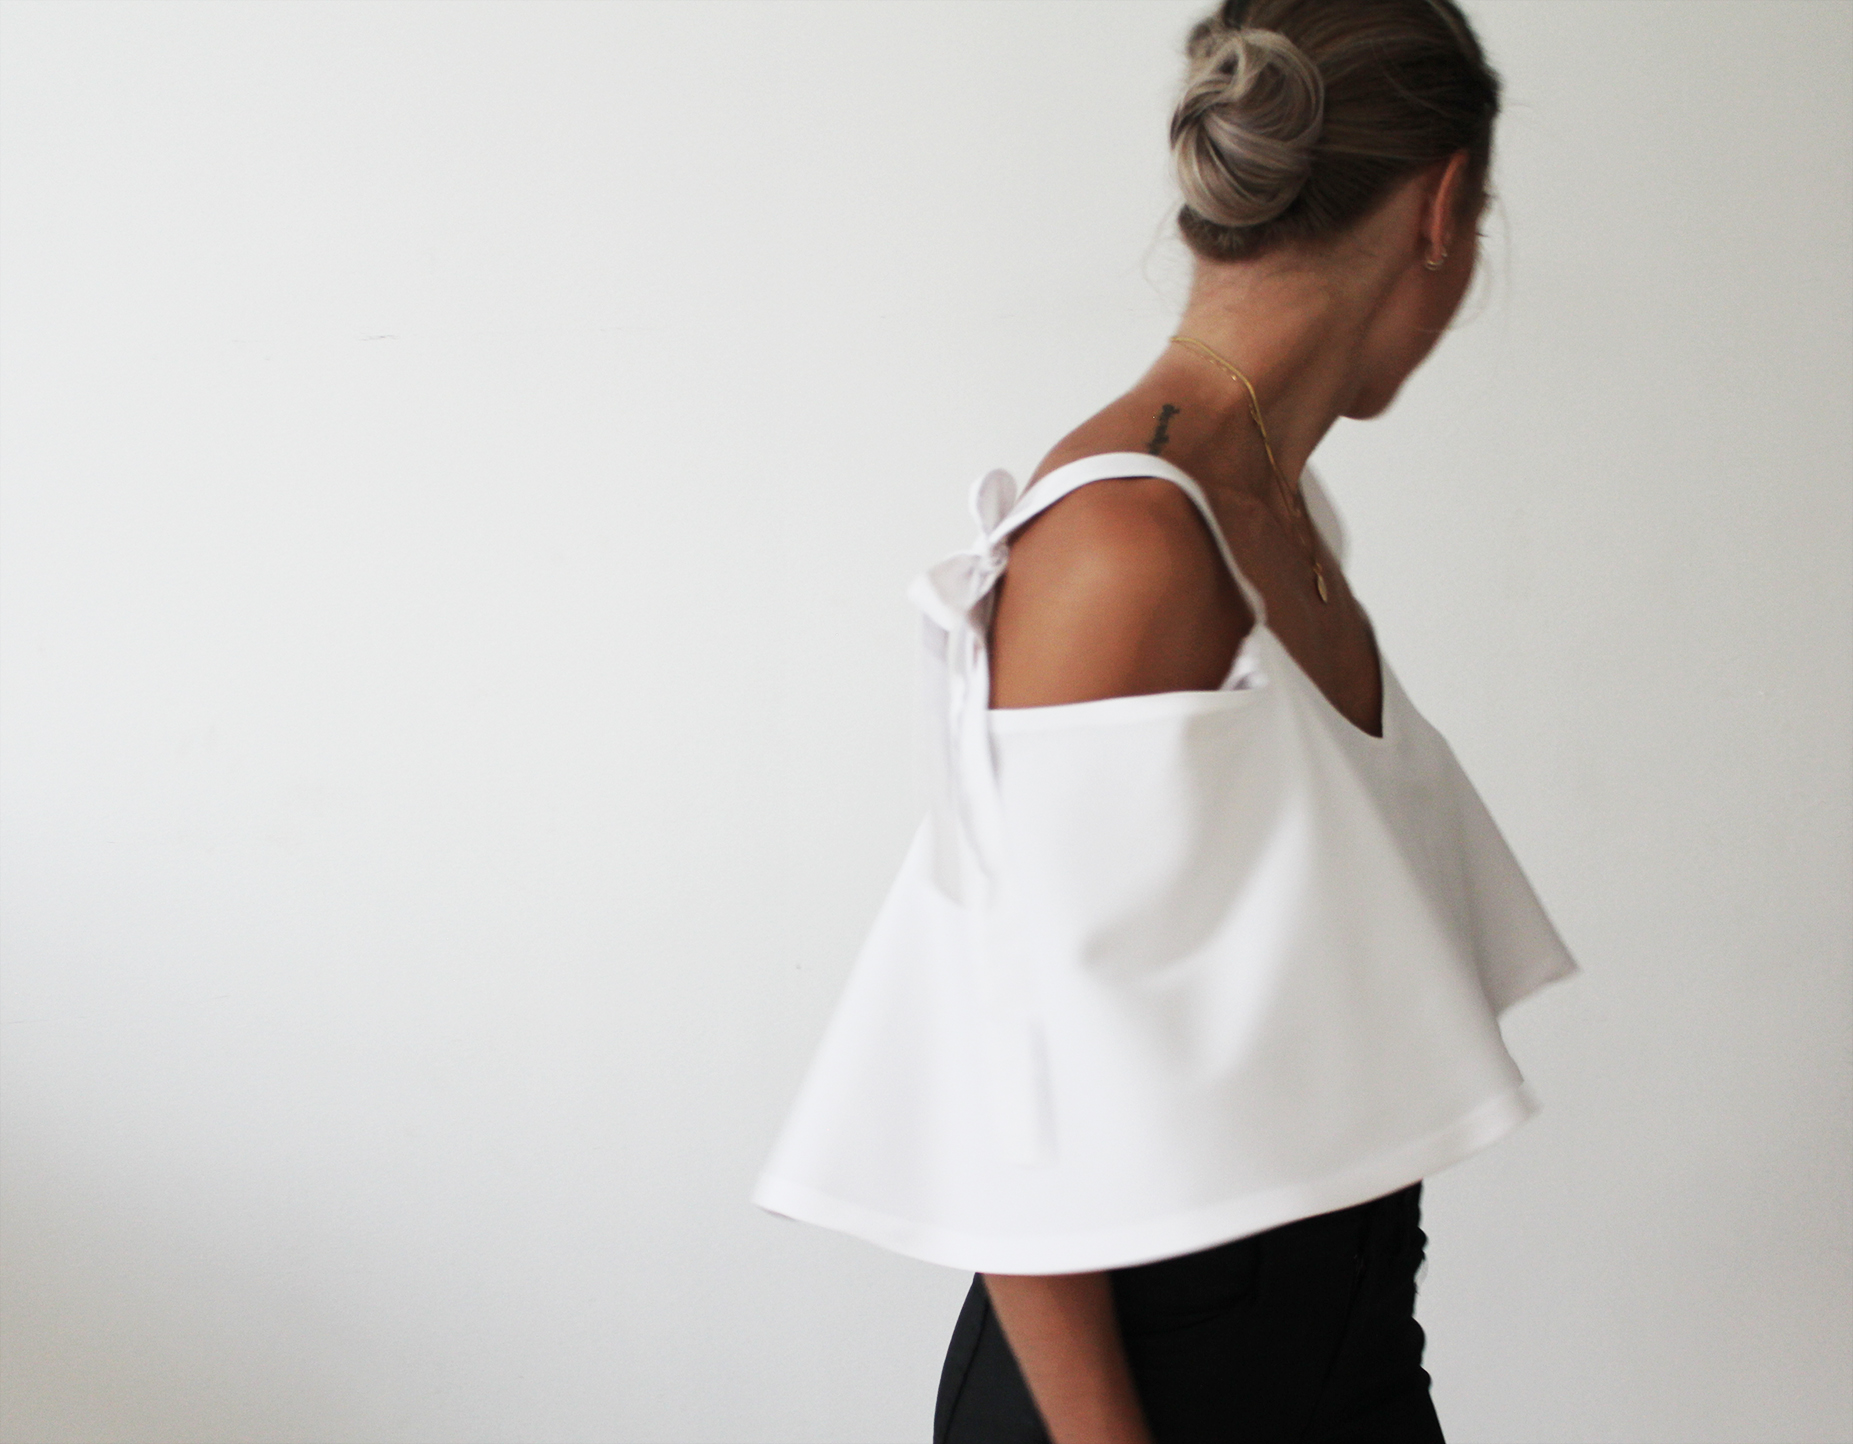
The 4 straps you could make with ribbon, or out of the same fabric as the top - I did the latter using the same method I did with the belt in this post. Note that if you want to tie the straps at the back I did, but want the loose ends of the ribbons to be the same length, then you need two longer straps for the front and two shorter for the back (60 cm and 80 cm should do it).
The 4 straps you could make with ribbon, or out of the same fabric as the top - I did the latter using the same method I did with the belt in this post. Note that if you want to tie the straps at the back I did, but want the loose ends of the ribbons to be the same length, then you need two longer straps for the front and two shorter for the back (60 cm and 80 cm should do it).

II. Finish the curved arm holes with a double-fold and straight stitch. Press.
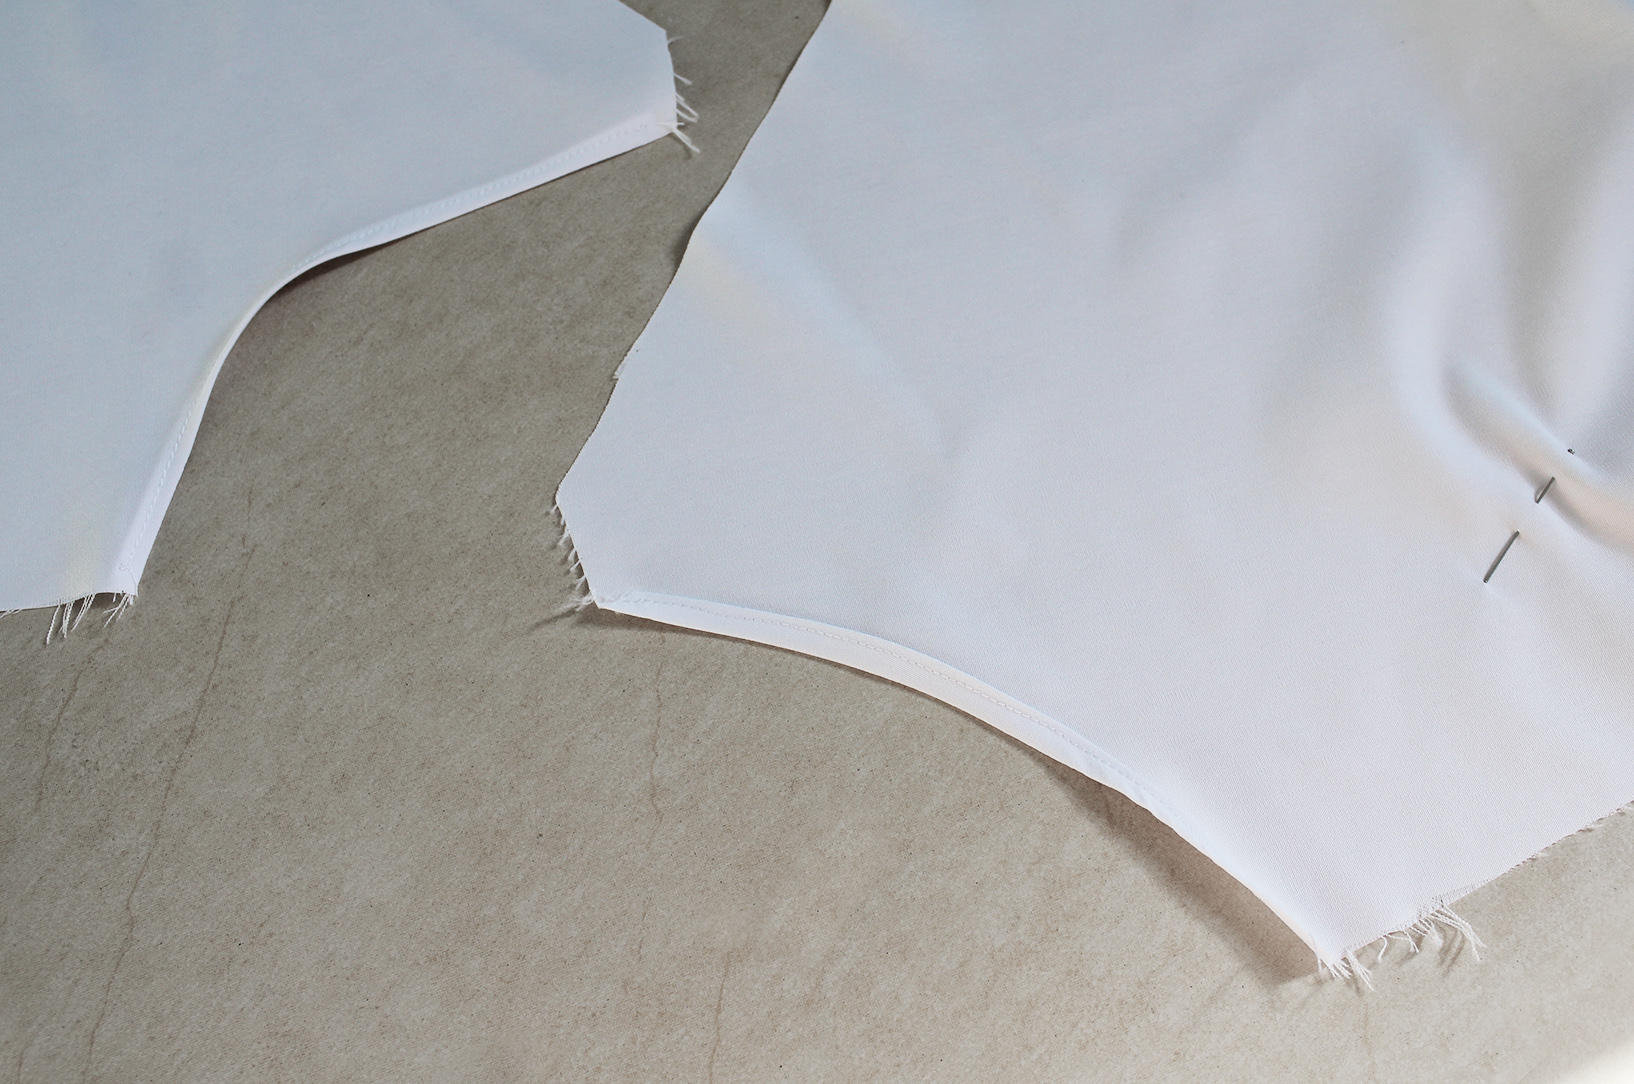
III. Pin the top sides together, right sides facing. Sew, zig-zag raw edges if you need to, and press the seams.
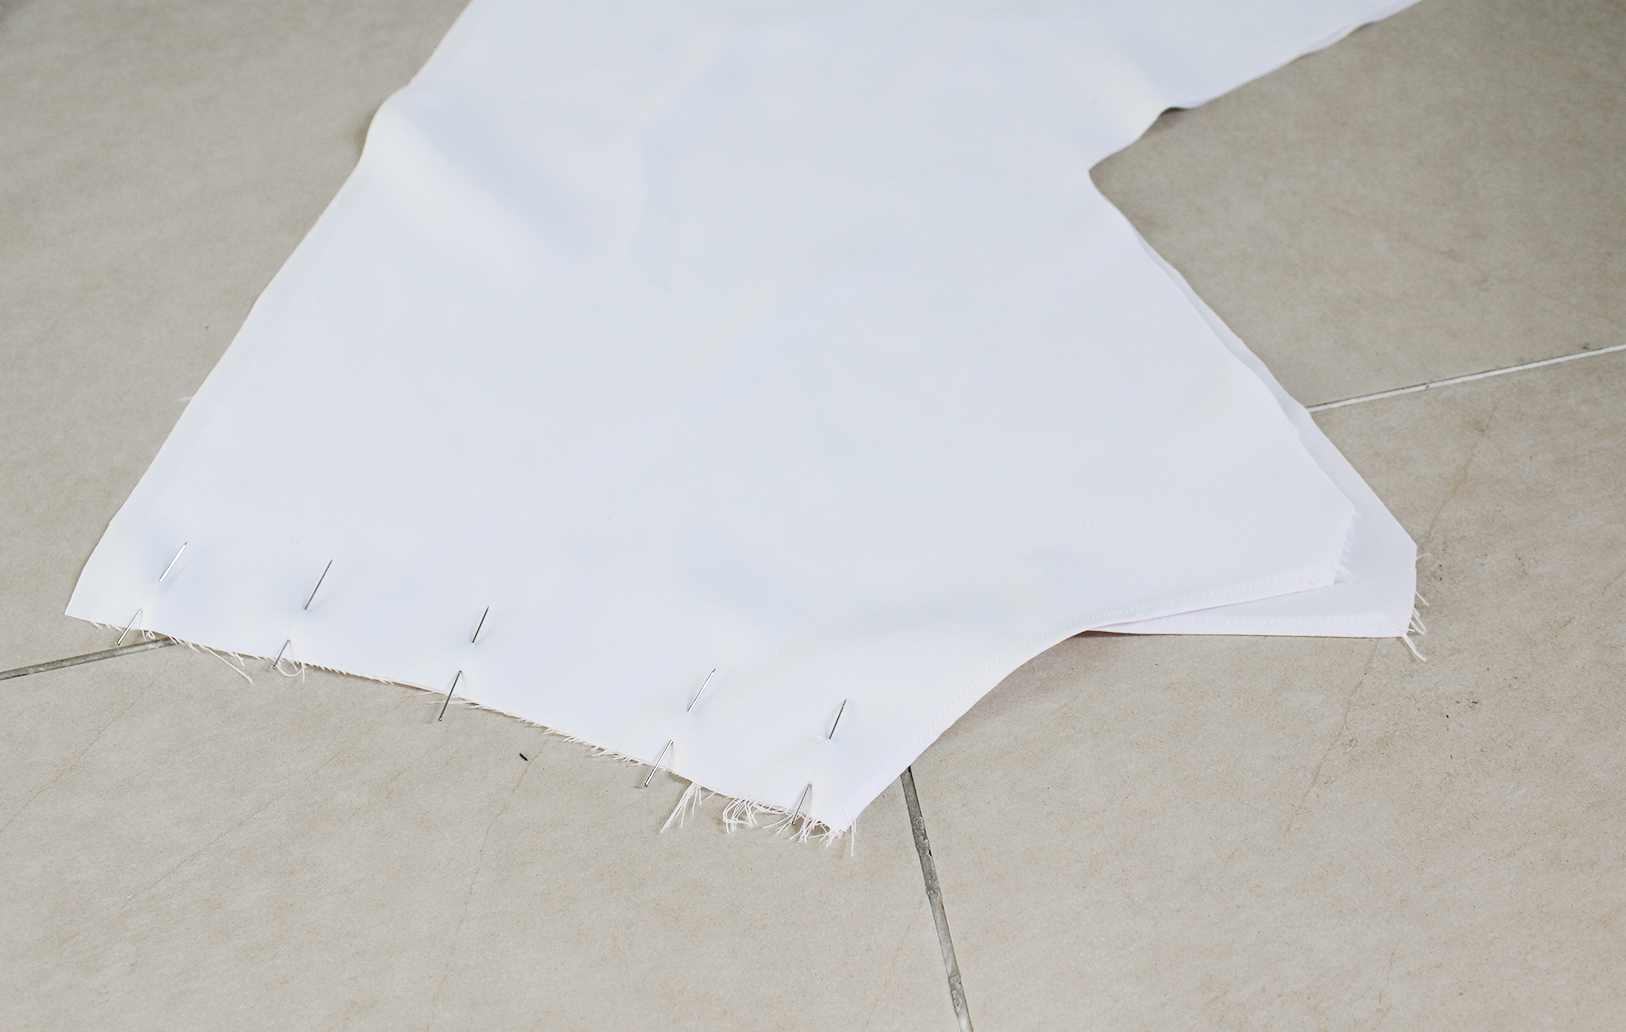
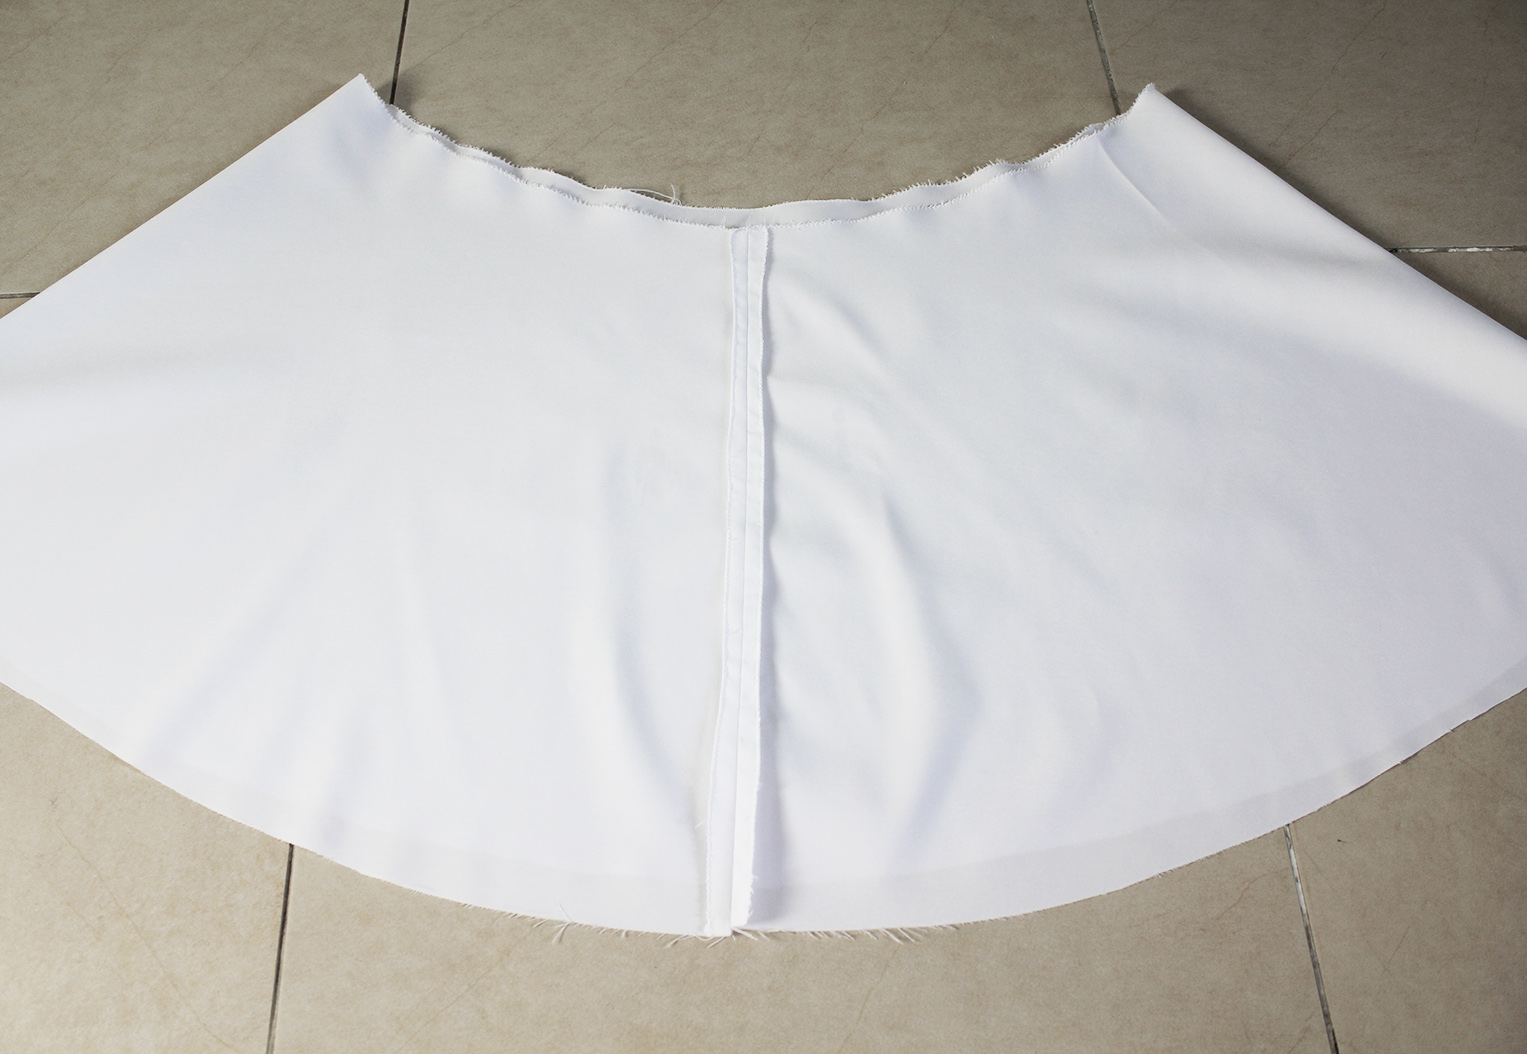
IV. Complete the circle with a stitch and a press of the seam like this. You can zig-zag the upper raw edge as well.
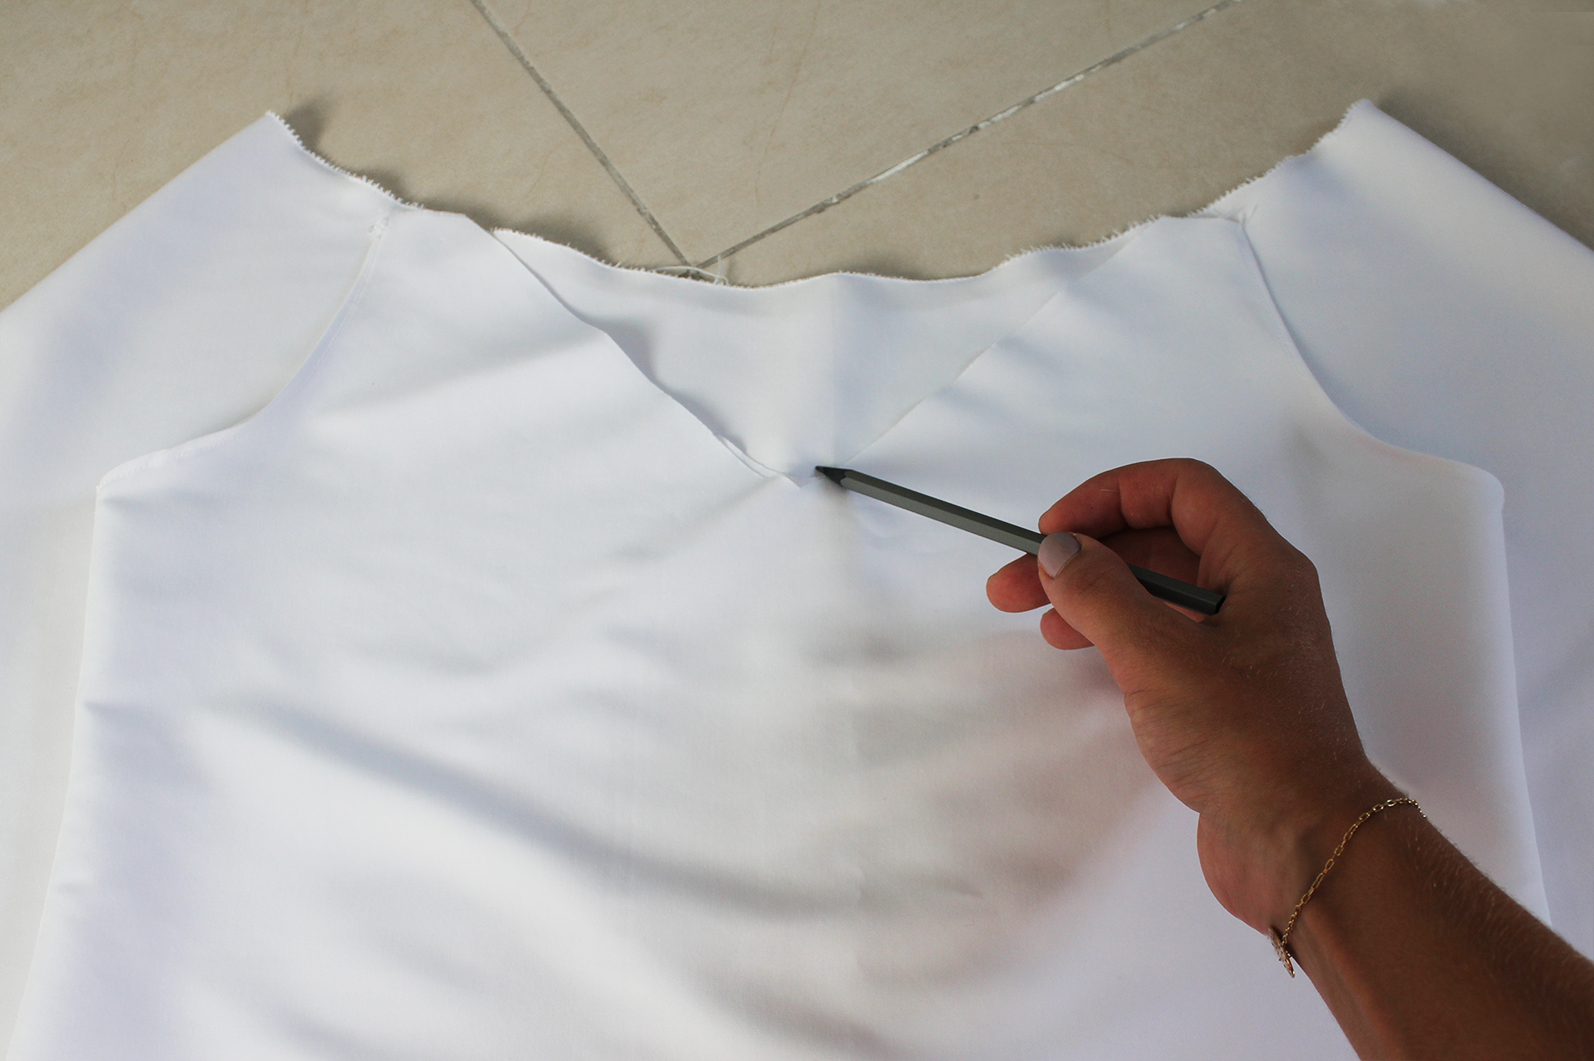
V. To attach the top pieces together, first lay the circle piece flat, reverse side out, and the seam centered at the back. Place the top on it, making sure it's centered (the neckline V should lay on top of the back seam as you can kind of see in the image below). Trace the neckline V onto the circle piece..
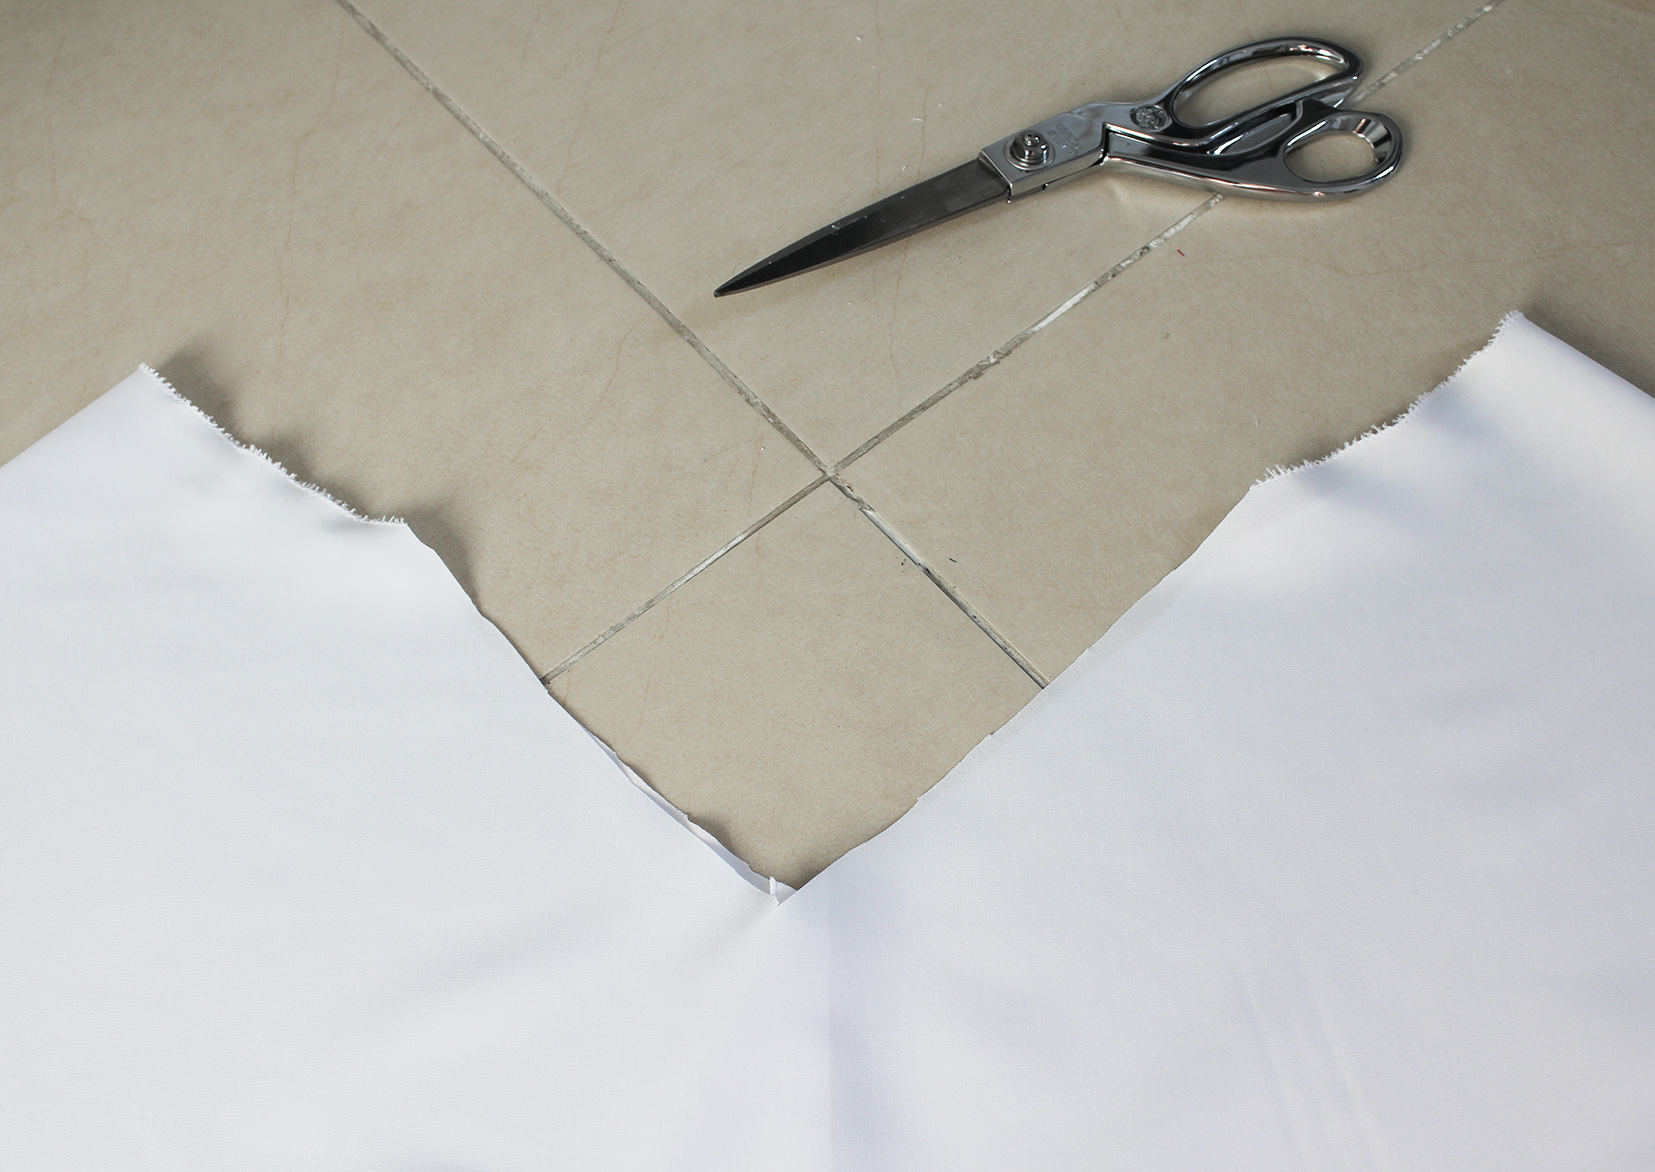
.. And cut it out.
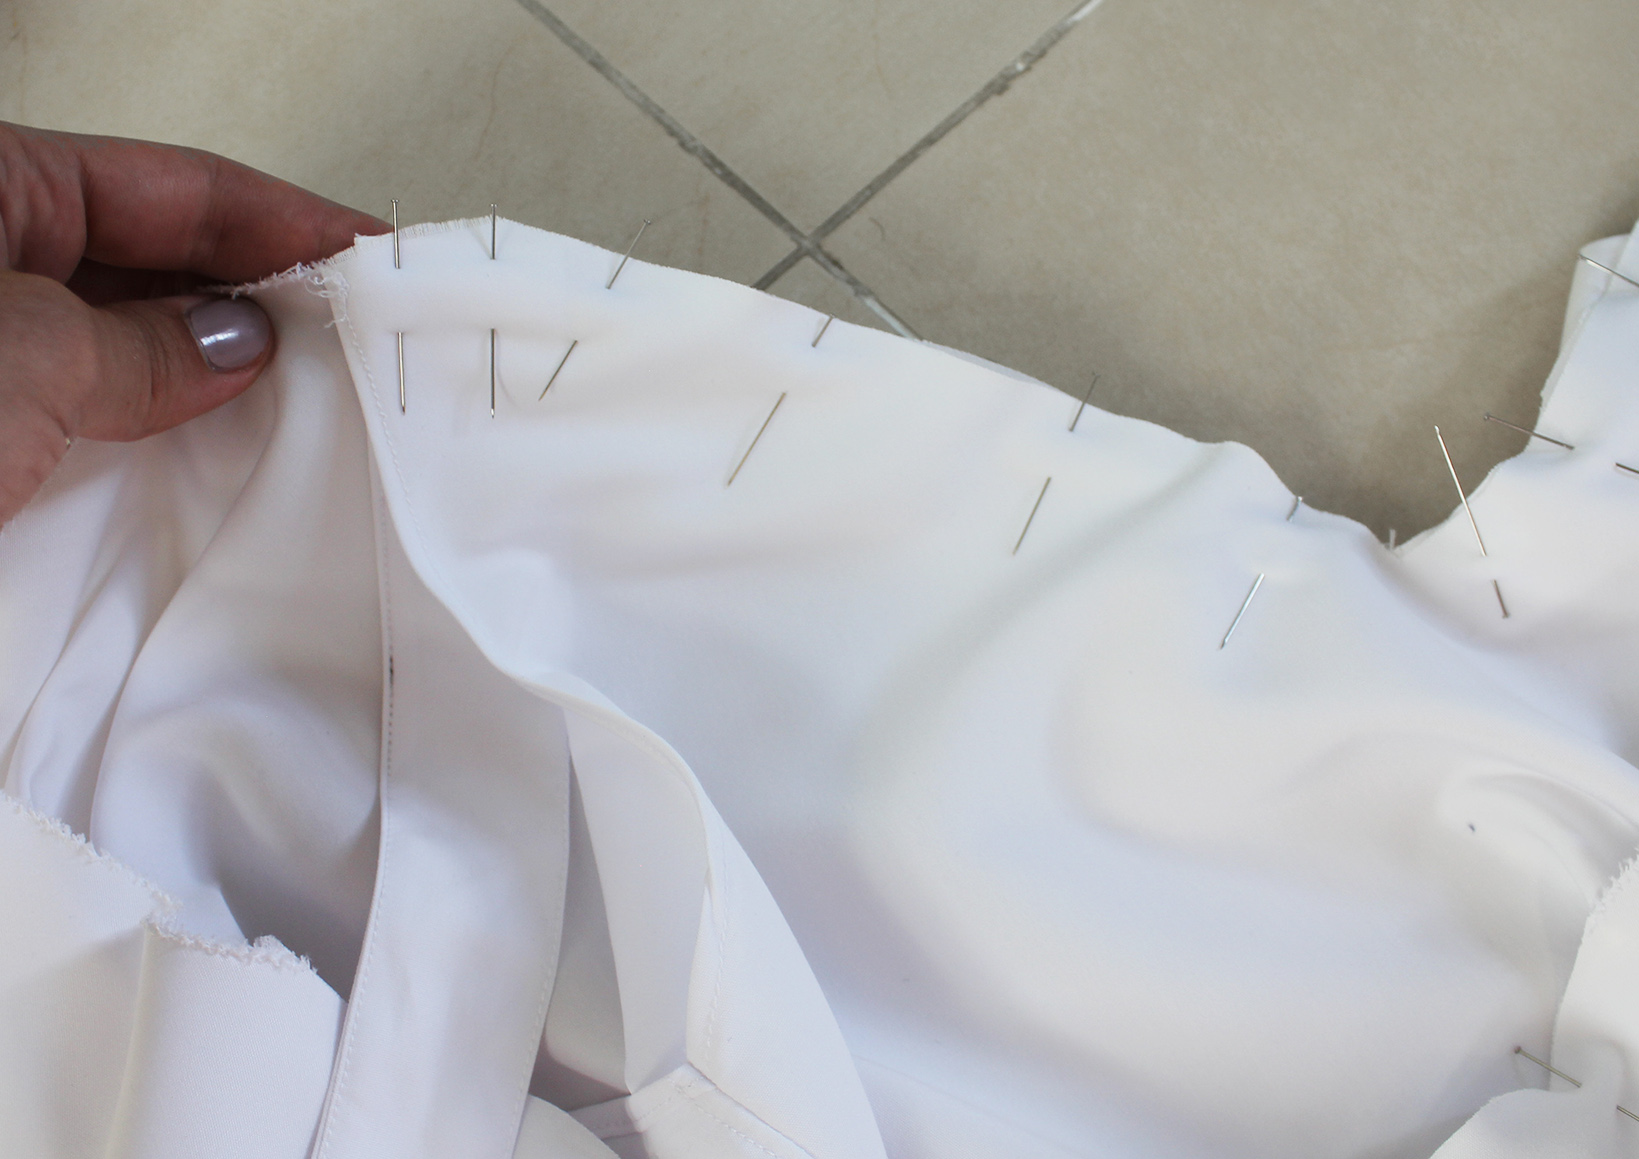
Then just pin the necklines together. Note that the wrong side of the top must be facing the right side of the circle piece. When you get to the flat bit of your top piece, add one of your straps in between the circle piece and the top piece:
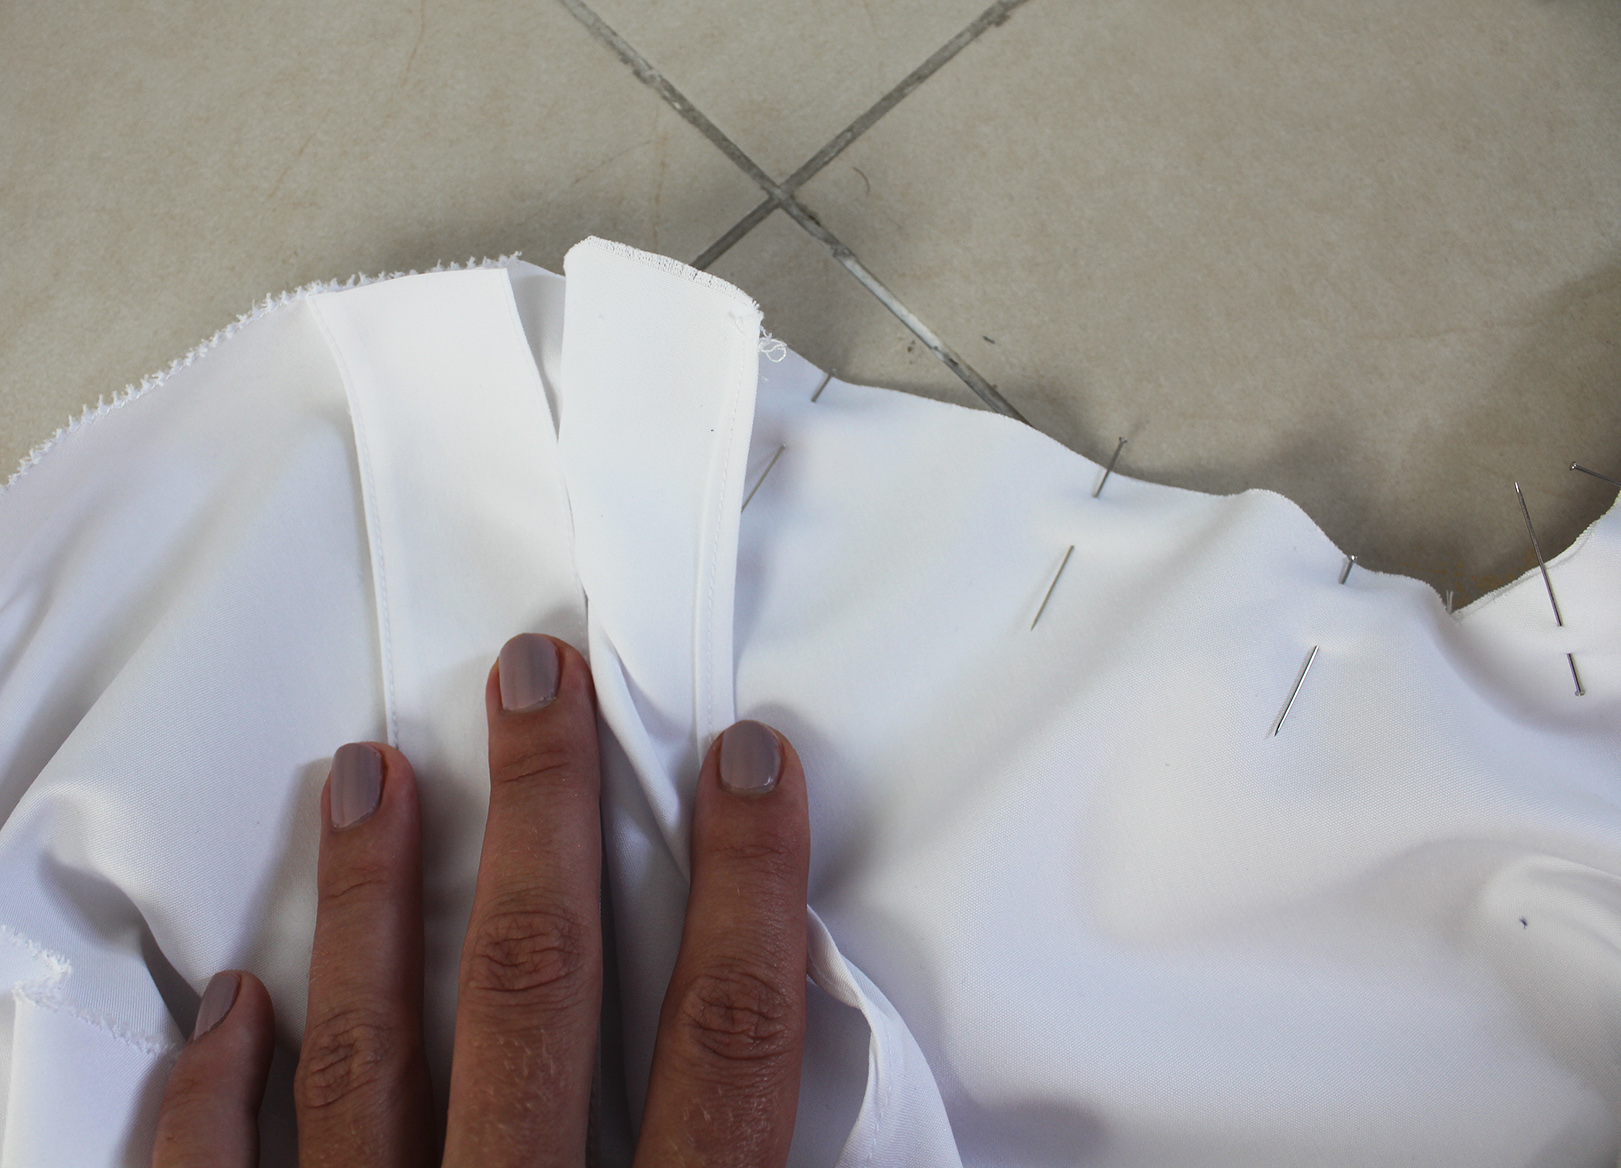
And continue pinning until the end of the top piece. Repeat this for all the 4 straps, and sew a straight stitch about 0,7 cm from the edge.
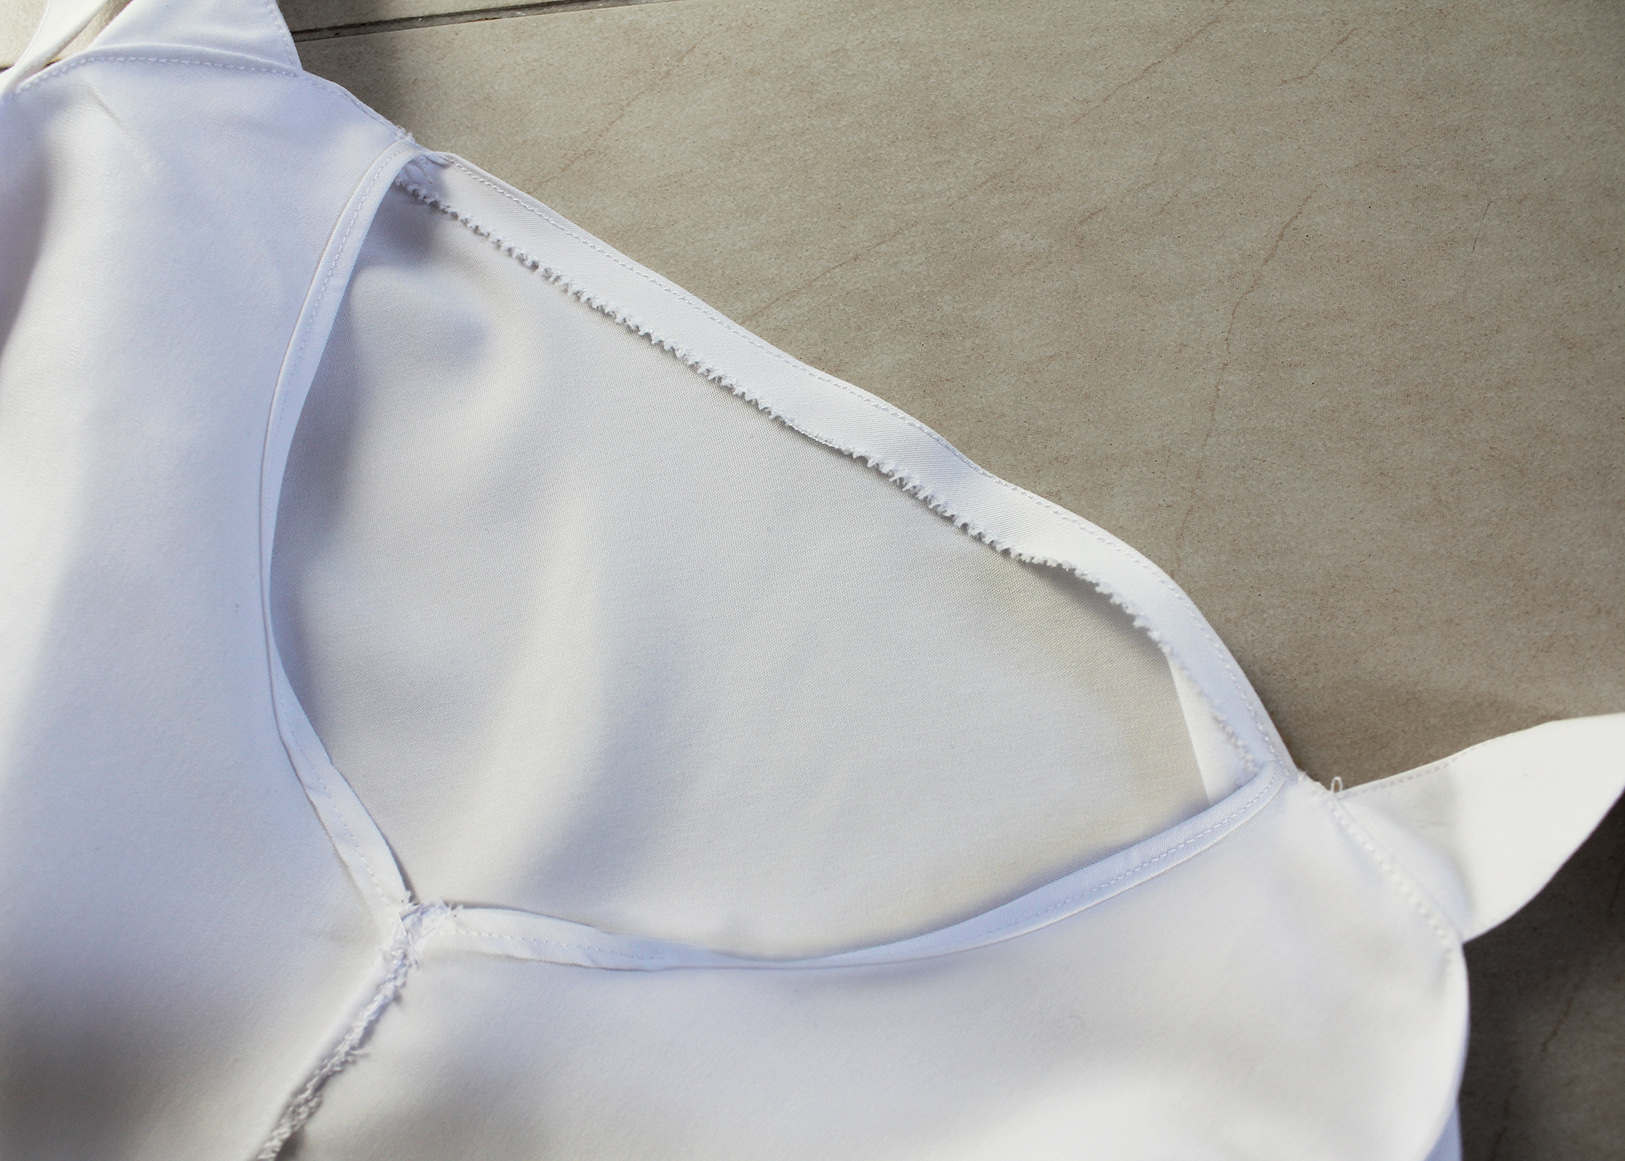
Clip the bottom of the V in the front and at the back (to remove tension and puckering). Turn right side out and press the seam.
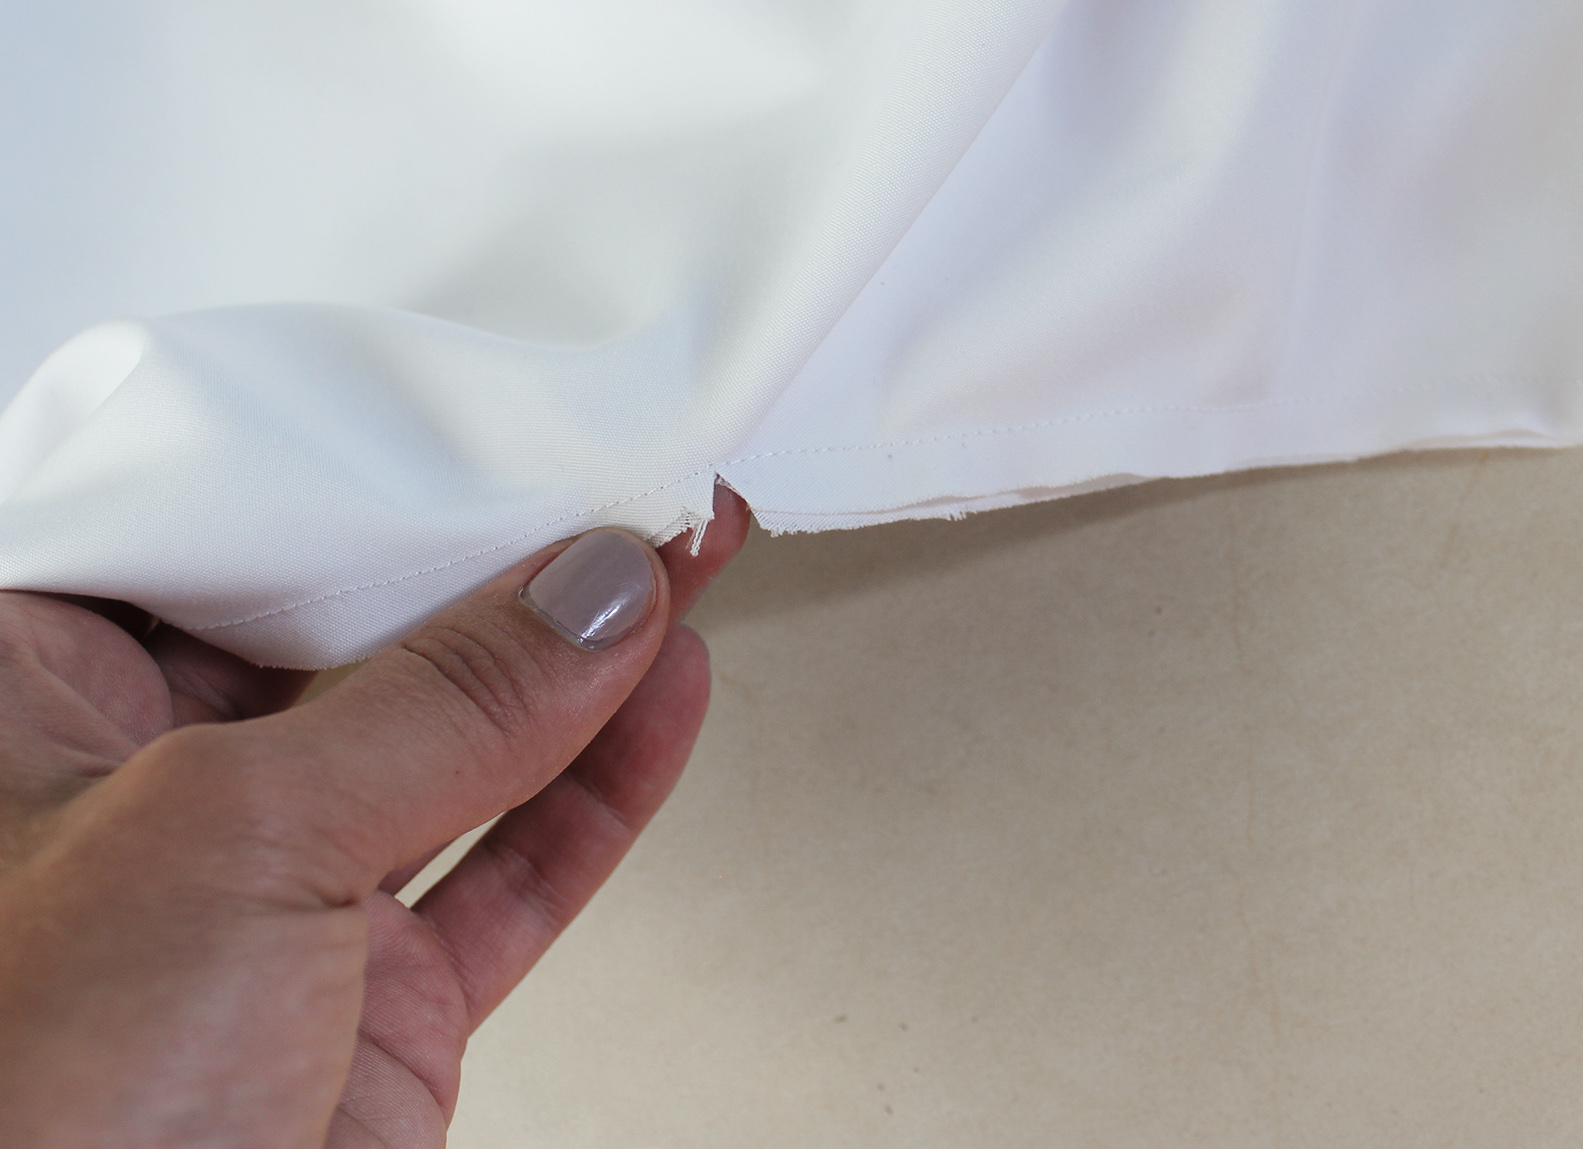
I also added a stitch at the edge to give the seam a clean finish.
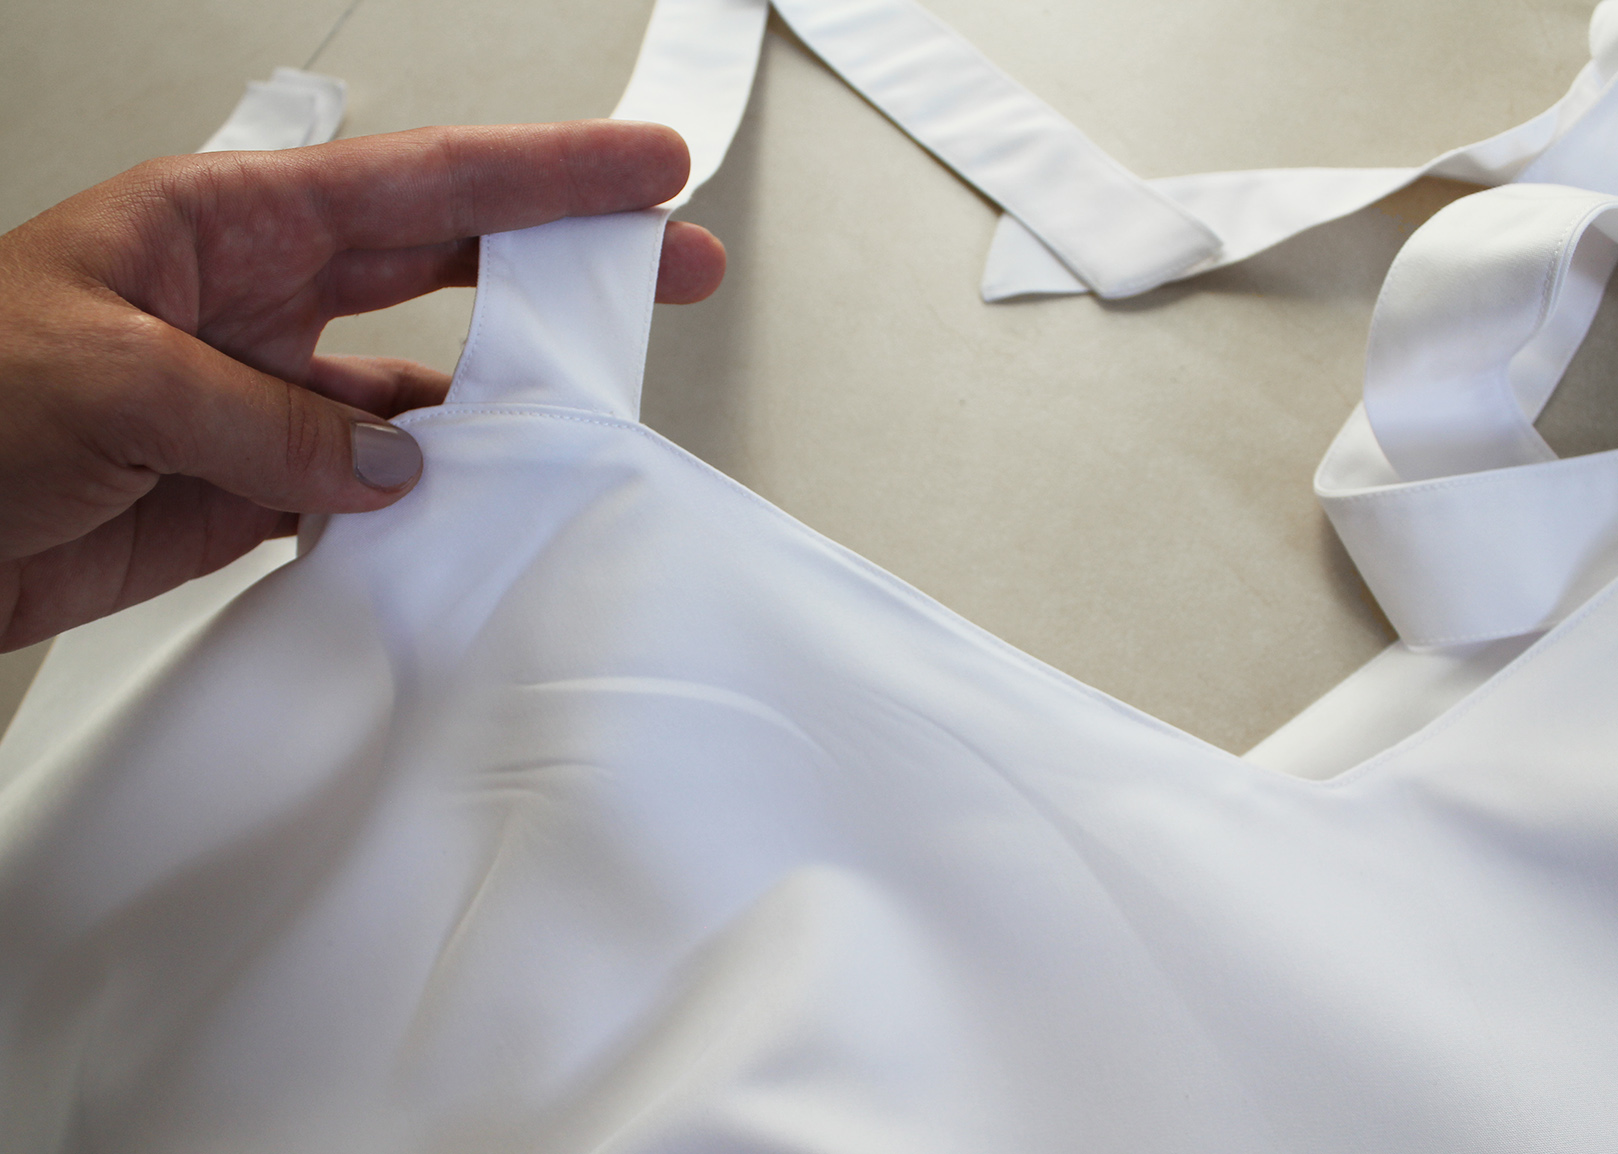
VI. The last step is to hand-stitch a fold to the remaining raw edges at the sides (the part that will wrap around your arms when worn). As you can see, if you edge-stitched all around, this part will already stay put nicely, the hand-stitching is just to make sure it doesn't flip when you're wearing the top.
Press everything, tie up your straps, and done!
xo,
Julia


Hi there! I realy love your blog and it has great been a greatly inspired me to start sewing! I just wanted to ask you whether your measurements include seam allowance?
ReplyDeleteThanks!!!
Hi Alexandra! Thanks for the lovely compliment:) Excited that you're looking to start sewing!! The measurements I put in the images are the full measurements of the cut pieces, seam allowances included. I hope that helps and let me know if you have other questions!
Delete